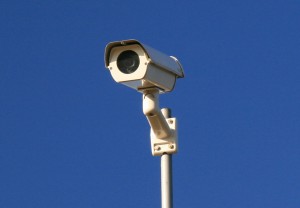
How to Setup A Home Video Surveillance System Without Monthly Fees
 In the first weeks of 2012 I added to my list of family goals for us to setup a home video surveillance system. Our family is very security minded and this was something we wanted to implement without signing a long term contract with a monitoring company. I'm not convinced that monitored home security systems are worth the money you pay… but that is a different article to be written. In the last month of the year we reached our goal. We setup the system we wanted and I though I would share with my readers how you could duplicate it.
Table of Contents
Requirements:
- A protected wireless network. (Password Protected Wireless Router)
- A significant amount of internet bandwidth. We have appx 20MB from our cable internet provider.
- A power outlet at each camera location. (Batteries won't last long)
First thing you need to do is some shopping. You are looking for a “Wireless IP Camera.” There are many brands and providers. Some of the most reputable include D-Link and Foscam. Read all the product specifications. Please understand that the software that allows you to monitor and operate the cameras is built into the cameras. They are their own computers and when you access them you will be logging into the computer installed on the camera. So, understanding fully the various features included in that software as well as the hardware is critical.
Some features to look for:
- How many unique cameras can be added to a single network?
- Does it offer the ability to detect motion?
- Does it Pan & Tilt (this is a feature worth it's money)
- Does it have some form of infrared technology that allows you to see in all lighting conditions?
- Does it have a microphone and/or speaker built into the hardware?
- Can you setup preset positions?
- Does it come with any mounting hardware?
- Can you record video?
Hopefully the cameras you select will come with detailed instructions to set them up. I will have to be a little more generic here since I don't know what you will be acquiring.
First, you will need to plug the camera into your wireless router directly with an Ethernet cable. This has to be done initially so that you can program the camera to login to your wireless network. Once you have plugged it in, your instructions should give you a specific IP address to type into your browser that will allow you to login to the camera.
REMEMBER: the software is running on the camera itself. There is no program on your computer. Nothing to install.
Once logged into the camera you should be able to program it to login to your wireless network. There will be a variety of other configuration steps you may need to take. These should include selecting a wireless port, username & password, and nickname. When selecting a wireless port, be sure to pick a random 4 digit number. The default number provided in the instructions may not be ideal. This port number is a big part of the security of your video surveillance system so it needs to be super unique. If you are using more than one camera you will need different port numbers for each one.
How to Monitor Your Wireless IP Cameras?
You will probably find that you need to use Internet Explorer to take advantage of all your camera's features. There are also a large number of apps available for Android or iOS that will fully monitor and/or operate your cameras. Search for IP Camera in the App Store or Google Play. If you intend to be able to access your cameras outside of your home network you will probably also need to add each of your cameras (with unique IP address and port) to the firewall exception list in your router's configuration. When accessing them outside of your home network you will need to use your home IP address with port number along with proper security credentials.
